Steps to Renew SSL Standard Instance Certificate (.pfx file)
Many times we receive renewed certificates from CA/Customer in .pfx format around certificate renewal time. As the SAP system won’t accept the .pfx certificate directly, we first need to convert it into a format accepted by the SAP system. To achieve this, below are the Steps to Renew SSL Standard Instance Certificate with a .pfx file.
Steps to Renew SSL Standard Instance Certificate
- First, we need to convert the .pfx file to a .pse file so that we can import it in STRUSTSSO2, for this we will use sapgenpse on a local PC. Download and extract via https://support.sap.com/en/my-support/software-downloads.html -> Installations & Upgrades -> By Category -> SAP Cryptographic Software -> SAPCRYPTOLIB -> COMMONCRYPTOLIB 8
- Use SAPCAR to exact your file
- Put all files in the same folder
- You will need a Global Root certificate from CA, execute the below command to convert file
# sapgenpse import_p12 -p “Path on PC\<SID>.pse” -r GlobalRoot.cer <path to .pfx file>
- Take a backup of existing instance pse
- STRUSTSSO2 -> Expand SSL Server Standard -> Double Click on Instance PSE
- Double-click on DN on the right-hand side
- PSE -> Save As -> File (Export PSE)
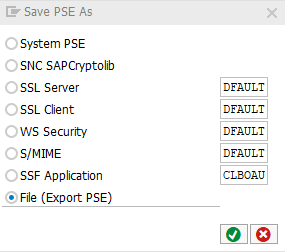
- Save the file as .pse
- Note that the next step will overwrite the PSE, hence make sure you have backup.
- Double-click on File from the Left-Hand side menu

- Select the new PSE generated from the .pfx file, pse will be loaded on the right-hand side, double-click on it to verify its validity
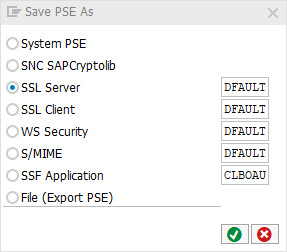
- PSE -> Save As -> SSL Server (DEFAULT)
- On the next screen Select the specific instance from the drop-down, and Select the Radio button to keep the certificate list i.e. Select No.
- Confirm on the Next Screen.
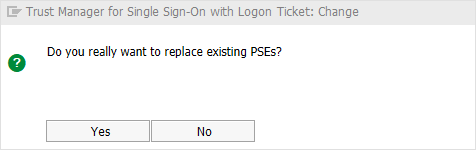
- Once you select Yes, PSE will be overwritten, and this cannot be undone. Hence make sure you have a backup.
- Save & then restart ICM via SMICM if the new cert is not reflected with the browser check.
References
- SAP Note 2148457
- SAP Note 1473710